Leather carving & crafting.

Moderators: PinkDiamond, John

jakesrocks
Posts: 723
Joined: Sat Jun 20, 2015 7:31 pm
Location: Aberdeen, S.D.

Re: Leather carving & crafting.

Post by jakesrocks »

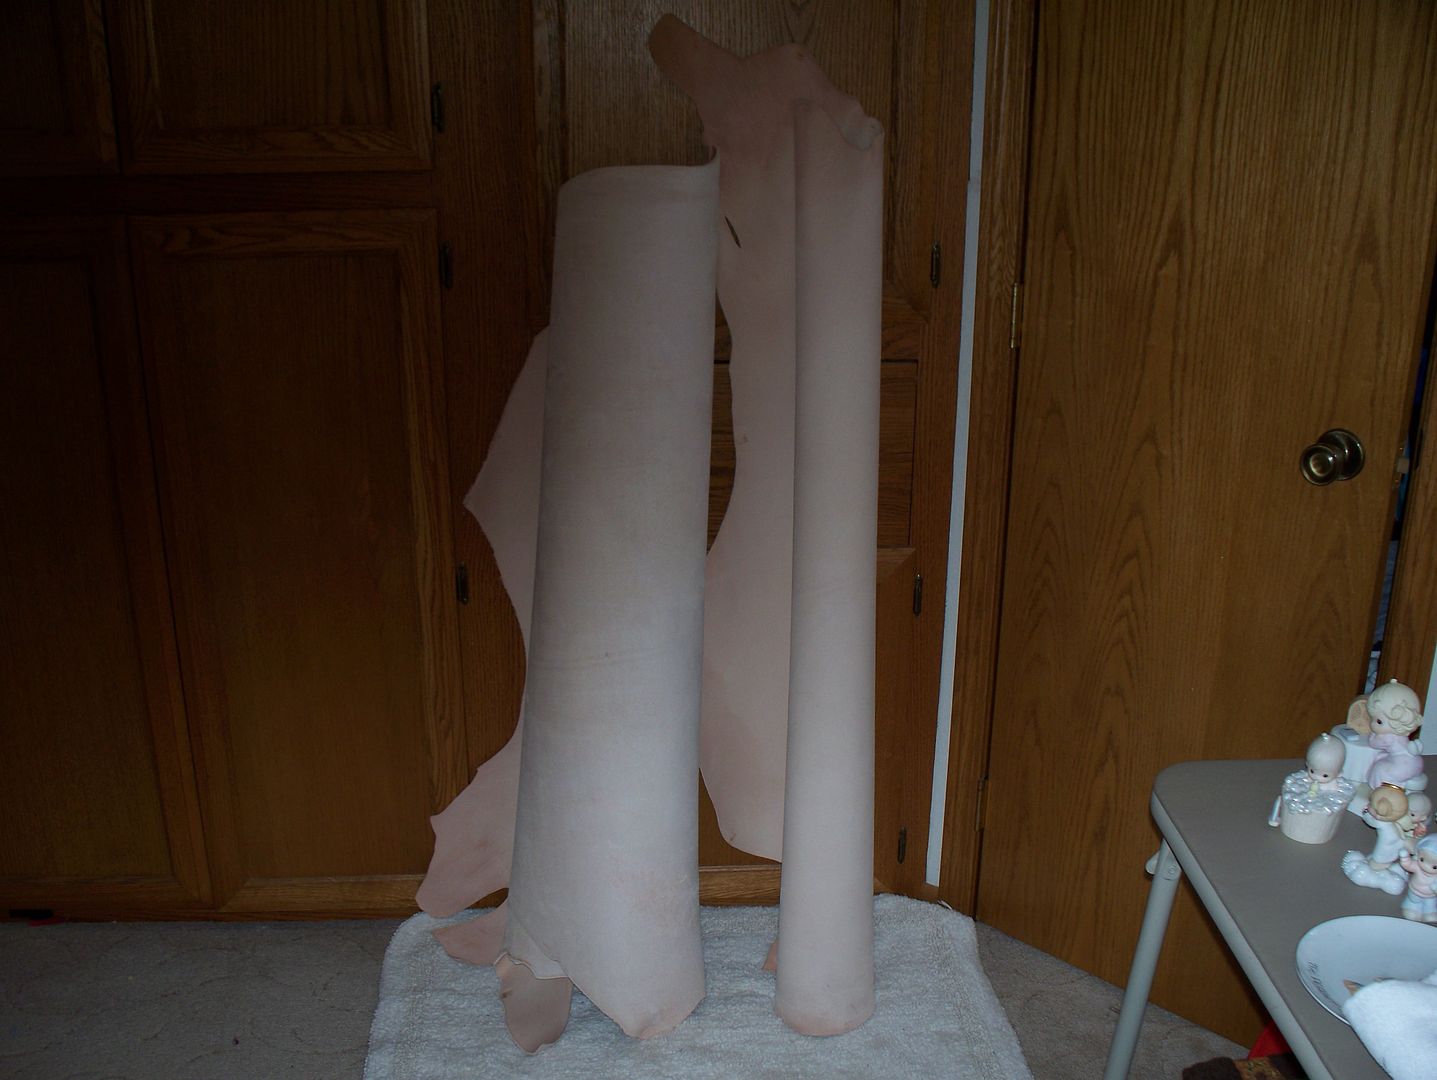
First and foremost in any carving and tooling leather project is the leather itself. For this type of work vegetable tanned leather is required. Preferably cow hide, but there are others that will work, but not as well. Pictured are 2 sides of vegetable tanned cow hide. One is 3 - 4 oz hide, (roughly 1/16" thick), and the other is 8 - 9 oz, (roughly 1/8" thick). The pictured hides are from Brazil, and bought from an American importer.

Vegetable tanning is achieved with tanic acid distilled from the bark of certain trees, usually oak. It is also referred to as oak tanning.

Image

There are 2 sides to the hide. The flesh side which was the side which was facing that nice prime rib that we so enjoy. And the grain side. The side that used to have hair on it. It's the grain side that is usually carved and tooled, though it is possible to work the flesh side for an unusual effect.
User avatar
PinkDiamond
Posts: 15631
Joined: Thu Jun 04, 2015 9:30 pm
Location: Ozark Mountains

Re: Leather carving & crafting.

Post by PinkDiamond »

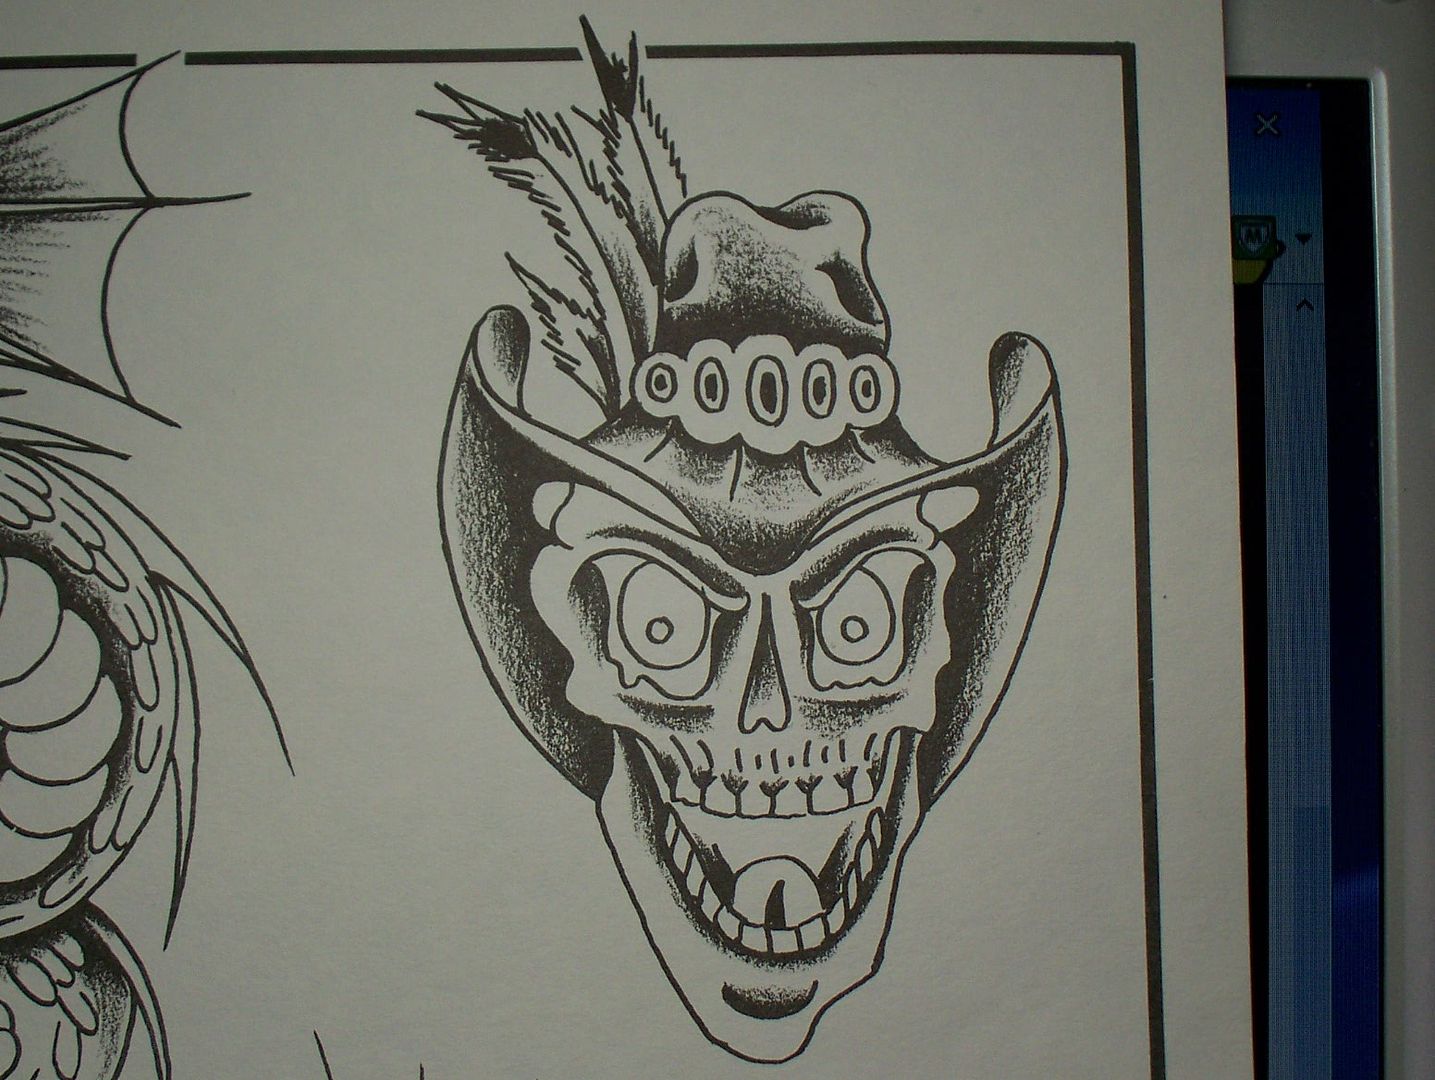
jakesrocks wrote:After looking at KJ's avatar & western hat, I think I've found the perfect leather carving pattern for her. (Don't worry Pink, I'll find one for you too). This is from a collection of tattoo flash art.

Image

Told ya I had a dark side. :twisted:


It does look rather like her hat! KJ, you look a helluva lot better in it. :lol:

That's gorgeous leather you have there, and I already learned stuff. This is going to be fun! :mrgreen:
PinkDiamond
ISG Registered Gemologist


· ´¨¨)) -:¦:-¸.·´ .·´¨¨))
((¸¸.·´ ..·´ There are miracles left for you to do .... -:¦:- -:¦:-
-:¦:- ((¸¸.·´* It all begins inside of you. ;)
User avatar
kjsspot
Posts: 1185
Joined: Fri Jun 05, 2015 12:22 am
Location: West Fargo, ND
Contact:

Re: Leather carving & crafting.

Post by kjsspot »

hahahahaha Me before coffee... ;)
~KJ~
Mysterious opals contain the wonders of the skies - sparkling rainbows, fireworks, and lightning, shifting and moving in their depths.
ETSY: http://www.etsy.com/shop/KJOFineArt
Website: http://www.kjmontoya.com
User avatar
PinkDiamond
Posts: 15631
Joined: Thu Jun 04, 2015 9:30 pm
Location: Ozark Mountains

Re: Leather carving & crafting.

Post by PinkDiamond »

That's our KJ. Honest to a fault, but I still don't believe it.
ROFLMAOemoticon.gif
ROFLMAOemoticon.gif (11.09 KiB) Viewed 434 times
PinkDiamond
ISG Registered Gemologist


· ´¨¨)) -:¦:-¸.·´ .·´¨¨))
((¸¸.·´ ..·´ There are miracles left for you to do .... -:¦:- -:¦:-
-:¦:- ((¸¸.·´* It all begins inside of you. ;)
jakesrocks
Posts: 723
Joined: Sat Jun 20, 2015 7:31 pm
Location: Aberdeen, S.D.

Re: Leather carving & crafting.

Post by jakesrocks »

When making something from leather, the first step is to cut out the various parts. If making more than one of the same item, purse, knife sheath etc. I find that cutting a template out of thin plexiglass, metal or masonite is a great help.

Anyway, after cutting your parts the next step is a process called casing. This is nothing more than wetting the leather to soften it. It used to be that casing meant soaking the leather in water until bubbles quit coming from the leather. Then letting the leather dry until almost all water is out. Very time consuming. With improved tanning processes it is now possible to case the leather with a damp sponge. First dampen the flesh side, and then the grain side. When dampened the leather will change from that nice creamy color to a mid range brown. It's now necessary to allow the leather to dry until it's almost its original creamy color. almost but not quite dry. The leather is now ready for tracing your cutting pattern to the leather, cutting in the pattern and doing the tooling work. I'll explain all of these processes in more detail, and with pics later. Two things to remember. #1 the leather must remain slightly damp through out the tooling processes. #2. Use only a glass, plastic or porcelain bowl for water to dampen your sponge. Metal salts may leach out of a metal container which will cause streaking and discoloration to your leather. And I guess I should add a #3 here while I'm at it. Your hands must be absolutely clean when working leather. Wear disposable gloves if you can stand them, or wash your hands often. The reason for this is natural skin oil. Any oil which seeps into the leather will prevent dye from absorbing evenly, leaving a streaky looking end product.

More tomorrow. But for now, it's coffee and fudge brownie time. :D
jakesrocks
Posts: 723
Joined: Sat Jun 20, 2015 7:31 pm
Location: Aberdeen, S.D.

Re: Leather carving & crafting.

Post by jakesrocks »

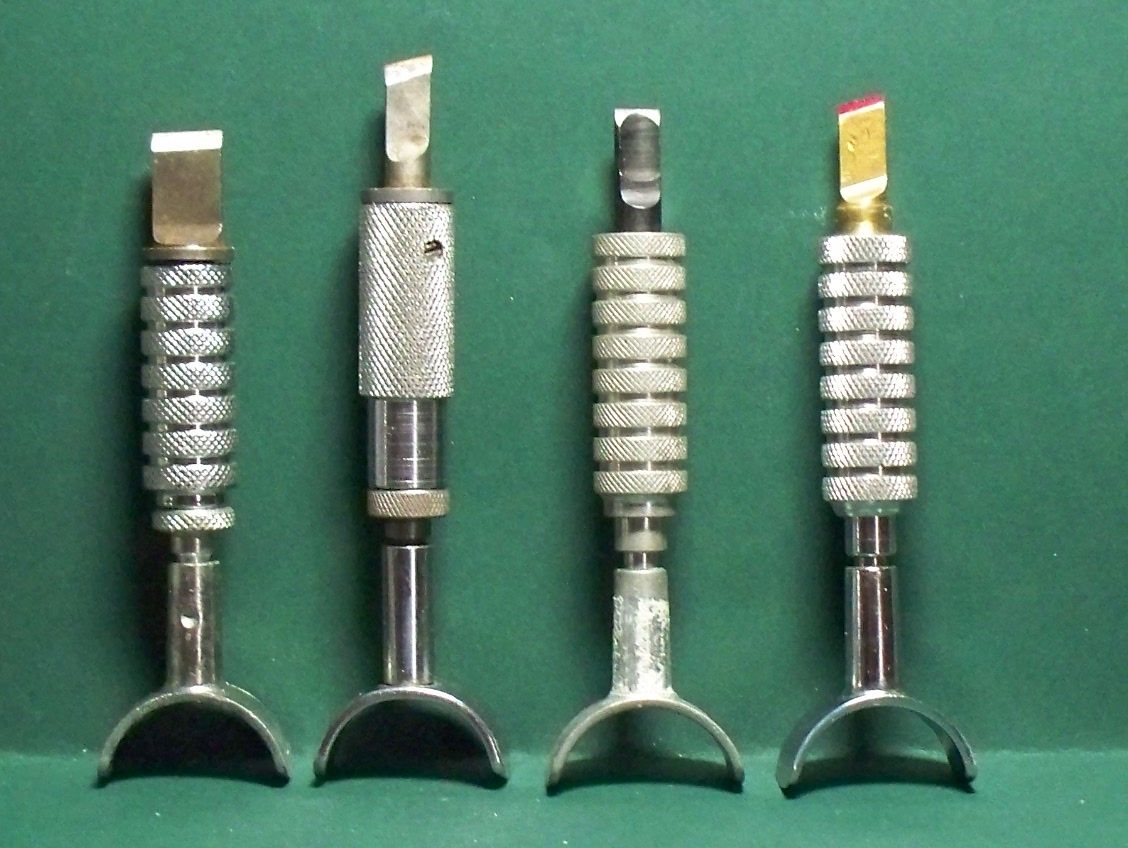
The most important tool for leather carving is the swivel knife. It is used for cutting in the outline of a design to be tooled. There are several types of blades made to fit these knives. I've included 4 types. 3 are common, and 1 is no longer made. these blades from left to right are the flat or straight blade, the angled blade, the hollow ground blade, and the ruby blade.
The straight blade is used for cutting straight and gently curving lines. The angled blade is used to cut tightly curving lines. The hollow ground blade is used for filigree work, but can also be used a general purpose blade. And finally the ruby blade. These were produced by Tandy Leather for a few years, but costs were high and sales were low because of the cost. The red tip on that blade is an actual piece of man made ruby which is bonded to a brass shank. They're getting very rare to find. I was lucky enough to score one in a batch of used leather tools that I bought on ebay.

Here are the swivel knives and the blades I listed.

Image

It is important that these blades be kept very sharp. I'll be adding pics and text here in a bit of the supplies needed to keep them in top shape.
jakesrocks
Posts: 723
Joined: Sat Jun 20, 2015 7:31 pm
Location: Aberdeen, S.D.

Re: Leather carving & crafting.

Post by jakesrocks »

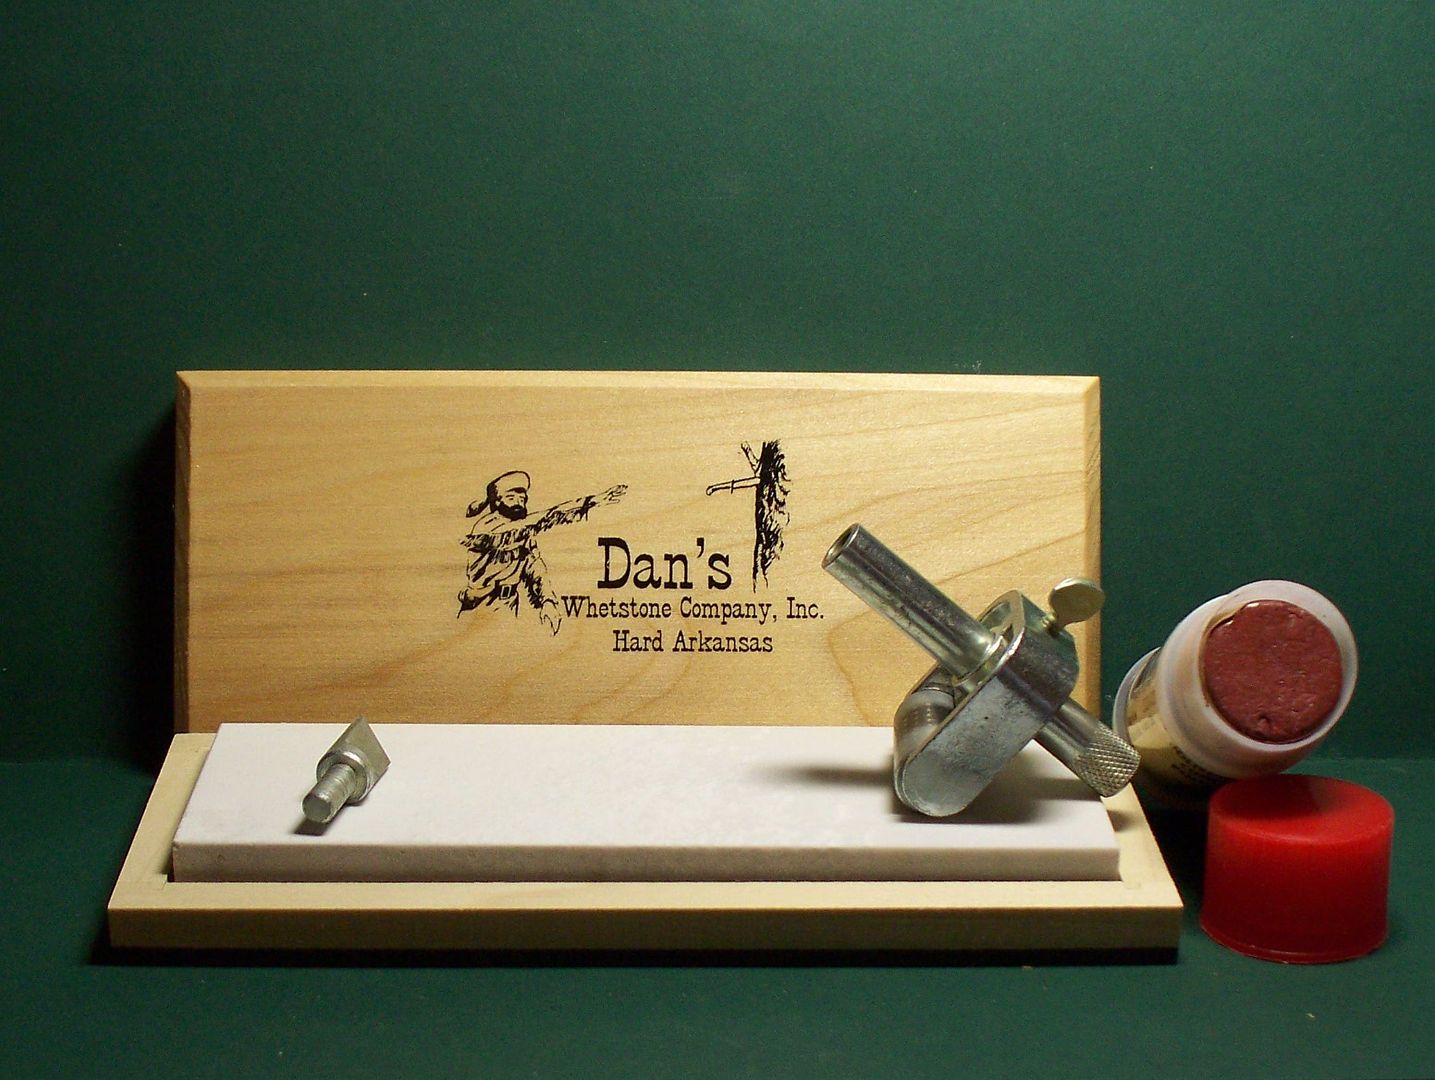
Here we go again. Most of the things needed to keep swivel knife blades sharp. # 1, a good hard & fine grit Arkansas oil stone.
# 2, A little tool sold by Tandy Leather which holds the blade at the correct angle for sharpening. # 3. A stick of red jewelers rouge. Not pictured are a can of 3 in 1 oil, and a piece of leather glued to a flat board with the grain side out.

Image

Sharpening is done by removing the blade from the swivel knife and inserting it into an opening at the end of the sharpening tool. Angle of the blade is adjusted with the thumb screw at the top. Simply loosen the thumb screw and move the rod holding the blade until the angle while resting on the oil stone equals the pre ground angle of the blade. Tighten the thumb screw, put a few drops of oil on the stone and with just a little pressure on the blade with a finger slide the blade and tool forward along the stone. Do this 2 or 3 times with each side of the blade and check sharpness. If needed repeat with each side of the blade until sharp. It's very important to sharpen each side equally to keep the cutting edge centered in the blade. Remove the blade from the sharpening tool and clean every bit of oil off of the blade. ( This is important. You don't want the slightest amount of oil touching your leather when you start cutting.) Replace the blade in the swivel knife. Rub a little bit of jewelers rouge into your leather piece ( strop ), and draw your blade along the strop a few times per side. This is to remove the burr along the cutting edge which is raised while sharpening. Now you're ready to start cutting that pattern. Keep your strop handy. If you start to feel drag on the blade while cutting, usually a few quick swipes of the blade on the strop will have you cutting again.

Sharpening the ruby blade is a bit different. It involves a thick piece of flat glass, a little dab of diamond paste and the sharpening tool. Proceed as you do with the oil stone. Stropping isn't needed with ruby.
User avatar
PinkDiamond
Posts: 15631
Joined: Thu Jun 04, 2015 9:30 pm
Location: Ozark Mountains

Re: Leather carving & crafting.

Post by PinkDiamond »

Fascinating! I'm enjoying this very much, jake, and I like the way you set up your pics. :)
PinkDiamond
ISG Registered Gemologist


· ´¨¨)) -:¦:-¸.·´ .·´¨¨))
((¸¸.·´ ..·´ There are miracles left for you to do .... -:¦:- -:¦:-
-:¦:- ((¸¸.·´* It all begins inside of you. ;)
jakesrocks
Posts: 723
Joined: Sat Jun 20, 2015 7:31 pm
Location: Aberdeen, S.D.

Re: Leather carving & crafting.

Post by jakesrocks »

Thank you Pink. More pics & text coming, but need to get a new SD card for my camera. I'll see if mama can pick one up tomorrow.
User avatar
Lydia
Posts: 387
Joined: Fri Jun 05, 2015 5:12 pm
Location: West Coast of Canada

Re: Leather carving & crafting.

Post by Lydia »

I'm also finding this very interesting.
Post Reply